Christmas Ariel (Disney)
“The Disney store proudly presents our 2020 Holiday Special Edition Ariel doll. Richly costumed in a satin and velvet gown with faux fur trim and lace details, Ariel features beautifully styled, rooted hair, with a bow accent. It’s a holiday wish come true!”


Undergarments
This gown it doesn’t require layers of petticoat because it is a smaller skirt and is edged with fur, so it doesn’t flair out in twirls like other ballgowns do.
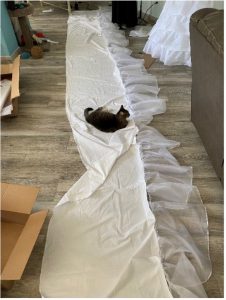
I used cotton broadcloth to make the bloomers. They have an elastic waistband at the top and a string around the lace cuffs to tighten to below my knees or above my knees.
The petticoat is made of 6 large cotton fabric squares, 12 rectangles of white organza, all gathered into a waistband. I used a serger to make the petticoat to give it a clean edge. The waistband buttons together.
I took my hip measurement and divided by 4. Then the length I wanted the cotton part of the petticoat to be and made a square. Then cut 6 pieces on the fold!
Underskirt
For the underskirt and pleated overskirt, I used Navy Blue Velvet and Jacquard Baby Blue.
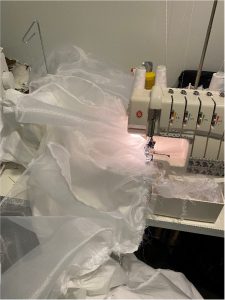
The underskirt of the ball gown is roughly 8 yards of fabric, gathered at the waist, at the bottom is a fur trim I cut and sewed myself. The fur was folded and zig-zagged stitched to hold, then sewn onto the skirt.
The fur trim was made by patterning out 4 in rectangles, cutting them out with a razor blade box cutter, zig zag stitching them together, then folding in half and zig zag stitching all the fur. There is roughly 15 yards of fur in the picture below.
There is a pocket on the left side, a zipper on the right, and two buttons for the waistband. With the fur trim sewn on, this skirt is complete!


Bodice
For the Bodice I made a mock-up with muslin and iron on interfacing.
First I built a muslin mock-up of the bodice. I wanted to see if the shoulders would look right before I cut the velvet. I trimmed the bottom to match, then took it apart and used the pieces to make the velvet bodice.
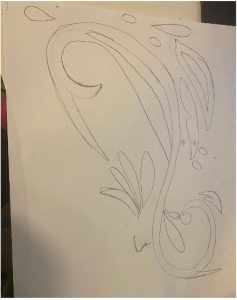
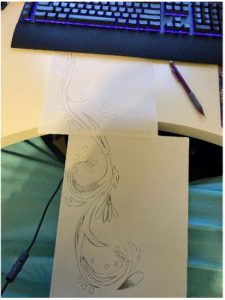
Then it was onto making the bodice. I drew out, then embroidered the filigree onto the bodice itself. While it looks beautiful on the bodice, I was worried that it would sink into the velvet and pucker. So, I switched to an appliqué process for the rest of the dress.
The sleeves are a long sleeve measured from the middle of my deltoid, to just before my wrist, then a flounce with a lace trim. The lace has little flowers on it. Then I drew out the filigree, and embroidred it onto navy blue chiffon. I zig zagged stitched the embroidery onto the velvet with gold thread.
The back is a grommet lace up with blue ribbon. Then the fur trim, bow, and tails were added to finish the bodice


Pleated Overskirt
The overskirt required some hand drafting and imagination. For the back, its circular, but upfront, it has a large, angled rectangle to give it the front pleat the doll has.
There is interfacing inside to strengthen the velvet and keep that crisp pleat.
I measured the skirt on the mannequin, how far I wanted the overskirt to come down. With the help of a tape measure, a paint can, chalk, pins, and Tyrande, I drew out the overskirt. I measured the how far the skirt should come to the front before adding my angled rectangle.
Next, I added the embroidery.


Bow
The bow is made with 2 large square pieces of velvet, stuffed with batting, and glued to a barrette.

Wig
The wig is a Fairy Tale Wig I purchased from RoyalWigCo, a wig stylist. It has been restyled a few times, with hot rollers, teasing, and hairspray.


Embroidery Process
I have a software program called Design Shop and my machine is a Melco Amaya XT 16 head machine.
To start, I hand draw out the embroidery for each piece. All together it took about 4 days to complete the embroidery. The longest part was the over skirt. It took 12 hours to digitize, and 12 hours to sew out. I used an applique process to make the embroidery pieces, which includes 3 layers of washaway interfacing, navy blue chiffon and a 15×17” embroidery hoop. The machine had to run at a slow pace due to the fragility of chiffon, and the pieces are so big they had to be done one at a time.
Once the bodice was drawn, I simply mirrored it then placed it in the Design Shop Program. I also pulled up a reference photo just to make sure it looked right, then got to work. One node at a time, I traced my drawing, adding vectors to make sure the stitches were all going the same direction.
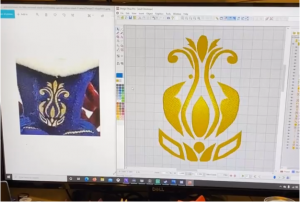


After tracing the design, I had to go back and smooth out the edges. Some of the stitches went past my nodes and made a rough looking design.
Because the stitches are so dense, they require a lot of stability. My machine had to go at its slowest pace, which is 700 stitches per minute. All of the designs fit a 15×17” hoop and had to be sewn out one at a time.
Each appliqué piece is cut out and the edges of the chiffon melted with a solder iron to prevent fraying. I ironed the appliqués to make them sit flat before being sewn on.


